Coffee makers and kettles are indispensable appliances in many homes, playing a key role in our daily routines. Whether you’re brewing your morning coffee or boiling water for tea, these devices are heavily relied upon. However, like any appliance, they require regular cleaning and maintenance to function efficiently and to ensure that the beverages they produce are safe and flavorful.
In this article, we’ll explore the essential tips for maintaining your coffee maker and kettle. We’ll cover why it’s important to keep them clean, how often you should do it, and the step-by-step processes to ensure they stay in top condition. We’ll also recommend some popular cleaning products available on Amazon UK to help make the job easier.
Chapter 1: Understanding the Importance of Maintenance
1.1 Why Regular Maintenance is Crucial
Regular maintenance of your coffee maker and kettle is essential for several reasons:
- Better Tasting Beverages: Over time, mineral deposits, coffee oils, and other residues can build up in your coffee maker and kettle, affecting the taste of your beverages. Regular cleaning ensures that these appliances continue to produce great-tasting coffee and tea.
- Prolonged Lifespan: Proper maintenance helps prevent wear and tear on your appliances, extending their lifespan and saving you money in the long run.
- Energy Efficiency: A clean coffee maker or kettle runs more efficiently, using less energy and heating water more quickly.
- Health and Safety: Mold, bacteria, and mineral buildup can accumulate in neglected appliances, posing potential health risks. Regular cleaning helps keep your coffee maker and kettle hygienic and safe to use.
1.2 How Often Should You Clean Your Coffee Maker and Kettle?
The frequency of cleaning depends on how often you use your coffee maker and kettle:
- Daily Use: If you use your coffee maker or kettle daily, clean them once a month.
- Occasional Use: If you use these appliances less frequently, cleaning them every two to three months should suffice.
- Hard Water Areas: If you live in an area with hard water, you may need to clean your appliances more often to prevent limescale buildup.
Chapter 2: How to Clean Your Coffee Maker
2.1 Basic Daily Cleaning
To keep your coffee maker in good condition, it’s essential to perform some basic daily cleaning tasks:
- Empty the Coffee Grounds: After each use, discard the used coffee grounds and rinse the filter basket with warm water.
- Rinse the Carafe: Rinse the carafe with warm, soapy water to remove coffee residue. If your carafe is dishwasher-safe, you can place it in the dishwasher for easier cleaning.
- Wipe Down the Exterior: Use a damp cloth to wipe down the exterior of the coffee maker, paying special attention to the buttons and areas that may have coffee splatters.
2.2 Monthly Deep Cleaning
A monthly deep cleaning will help remove mineral deposits, coffee oils, and other residues that can build up over time. Here’s how to do it:
- Prepare a Cleaning Solution: Mix equal parts white vinegar and water to create a cleaning solution. White vinegar is a natural descaler that helps dissolve mineral deposits.
- Run a Cleaning Cycle: Pour the vinegar solution into the water reservoir and run a brewing cycle without coffee grounds. This will help clean the interior of the coffee maker, including the water lines and brewing chamber.
- Pause Mid-Cycle: Halfway through the brewing cycle, pause the machine and let the vinegar solution sit in the coffee maker for about 30 minutes. This allows the vinegar to break down any stubborn buildup.
- Complete the Cycle: Resume the brewing cycle and let the rest of the vinegar solution run through the machine.
- Rinse with Water: After the vinegar cycle is complete, fill the water reservoir with clean water and run two or three cycles to rinse out any remaining vinegar. This will ensure that your next cup of coffee doesn’t taste like vinegar.
- Clean the Carafe and Filter Basket: While the vinegar solution is working on the interior, wash the carafe and filter basket with warm, soapy water. You can also soak them in the vinegar solution if they have stubborn stains.
- Wipe Down the Exterior: Use a damp cloth to wipe down the exterior of the coffee maker, including the warming plate, which can accumulate coffee spills and stains.
2.3 Descaling Your Coffee Maker
In addition to regular cleaning, descaling your coffee maker is crucial, especially if you live in an area with hard water. Limescale buildup can affect the performance of your coffee maker and alter the taste of your coffee.
- Choose a Descaling Product: There are several commercial descaling products available on Amazon UK, such as De’Longhi EcoDecalk Descaler or Durgol Swiss Espresso Special Decalcifier for all Coffee Machines. These products are specifically designed to remove limescale and mineral deposits.
- Follow the Instructions: Each descaling product will have specific instructions, but generally, you’ll mix the descaler with water and run it through your coffee maker in the same way you would with vinegar.
- Rinse Thoroughly: After descaling, run several cycles of clean water through the coffee maker to ensure all descaler residue is removed.
Chapter 3: How to Clean Your Kettle
3.1 Daily Cleaning
Kettles are used primarily for boiling water, so they don’t require as much cleaning as a coffee maker. However, a few simple daily tasks can help keep your kettle in good condition:
- Empty the Kettle: After each use, empty the kettle to prevent water from sitting inside, which can lead to mineral buildup.
- Wipe Down the Exterior: Use a damp cloth to wipe down the exterior of the kettle, especially around the spout and handle, where water may drip.
- Clean the Filter: Some kettles have a removable filter to catch limescale particles. Remove and rinse the filter under warm water if you notice any buildup.
3.2 Monthly Deep Cleaning
Even if you use your kettle daily, it’s important to give it a thorough cleaning once a month. Here’s how to do it:
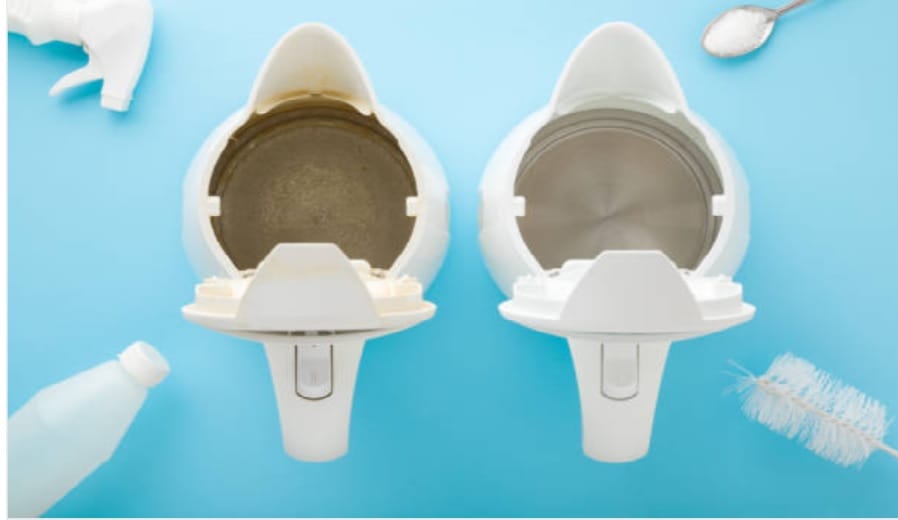
- Descale the Kettle: Limescale is a common problem in kettles, especially in hard water areas. Descaling helps remove these mineral deposits and keeps your kettle running efficiently.
- Use Vinegar or Lemon Juice: Fill the kettle halfway with equal parts white vinegar or lemon juice and water. These natural descalers help break down limescale and remove odors.
- Boil the Solution: Turn on the kettle and let the vinegar or lemon solution come to a boil. Once it has boiled, turn off the kettle and let the solution sit for 15-20 minutes to dissolve the limescale.
- Scrub the Interior: If there’s any stubborn limescale remaining, use a non-abrasive sponge or brush to scrub the interior of the kettle gently. Be sure to reach all the nooks and crannies.
- Rinse Thoroughly: After descaling, empty the kettle and rinse it thoroughly with clean water. Boil fresh water in the kettle and discard it to ensure no vinegar or lemon taste lingers.
- Wipe the Exterior: Wipe down the exterior of the kettle with a damp cloth. If your kettle has a stainless steel finish, you can use a stainless steel cleaner like Weiman Stainless Steel Cleaner and Polish from Amazon UK to keep it shiny and free of fingerprints.
3.3 Descaling Products for Your Kettle
In addition to vinegar and lemon juice, there are several commercial descaling products available that are specifically designed for kettles. Some popular options on Amazon UK include:
- Oust All Purpose Descaler: This versatile descaler works for kettles, coffee makers, and other appliances, effectively removing limescale and improving performance.
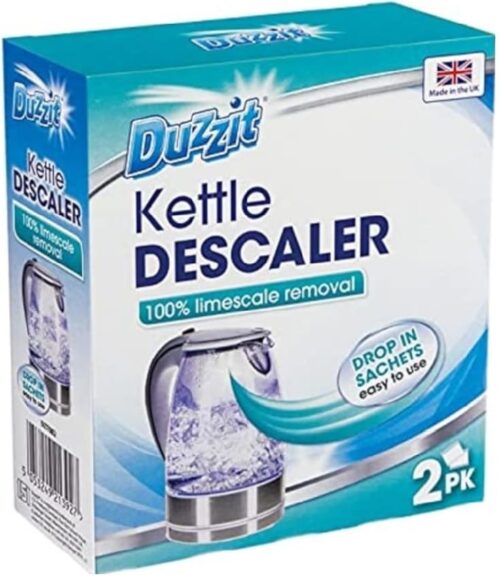
- Duzzit Kettle Descaler: This product is known for its fast-acting formula that quickly removes limescale from kettles, coffee makers, and other small appliances.


